How to Build a Wooden Crate: Easy DIY Storage Crate Plans
A beginner pine and plywood storage crate with two plywood end panels, six open side slats, and a fixed bottom. Includes exact dimensions, a full cut list, step-by-step instructions, and a free printable PDF.
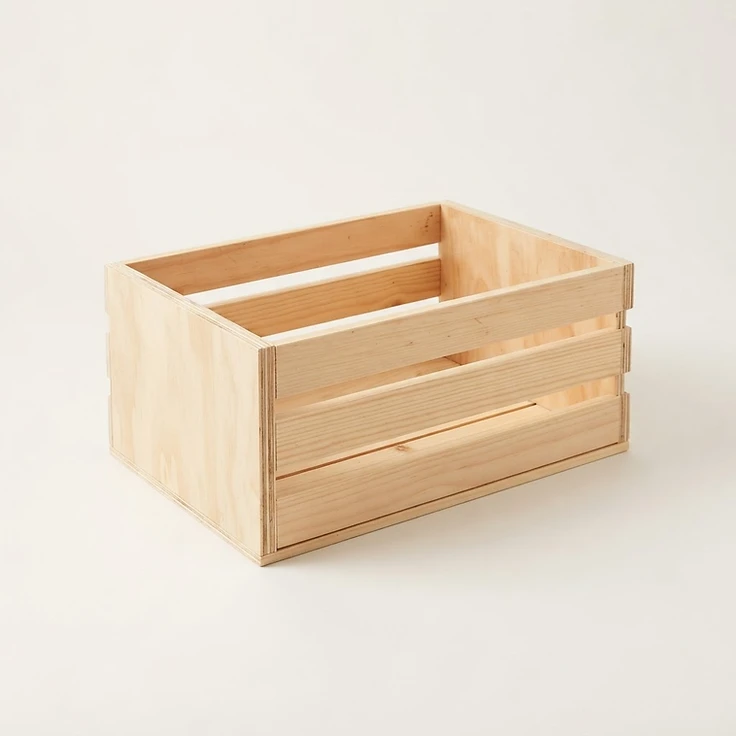
Design rendering of the V2.0 crate: two plywood end panels, three pine side slats per long side and three fixed bottom boards. This is an illustration, not a photograph of a finished build.
On this page
Introduction and Project Overview
A wooden crate is a practical beginner project for organizing lightweight items around the house. This design uses two plywood end panels, six pine side slats, and three fixed bottom boards. The finished outside dimensions are 18 inches long, 12 inches wide, and 10 inches high.
The instructions below correspond to Wood Project Lab's Wooden Storage Crate Plan V2.0. Download the printable plan before you cut lumber, and measure your actual stock: nominal board sizes can differ from their finished dimensions.
Still choosing a first build? Browse our beginner woodworking projects.
Project at a glance
Why this wooden crate design is simpler
The bottom boards fasten directly beneath the two solid plywood end panels, between the front and back side walls, and bear against the lower edges of the panels. That gives the crate a fixed floor without any separate floor framework to cut, fit or align: just two end panels, six side slats and three bottom boards. This follows a familiar end-panel-and-slat approach used in beginner crate construction. The open side slats give the crate a traditional look, while the fixed bottom keeps small objects from falling through.
Materials and tools
Use 3/4-inch plywood for the ends, nominal 1x3 pine for the long side slats, nominal 1x4 pine for the bottom, wood glue, and compatible 1-1/2-inch finish nails or brads. You will need a saw, measuring tape, square, clamps, sanding supplies, and eye protection. Use a drill and pilot bit when hand nailing, or an appropriately adjusted brad nailer.
The plan calls for one 3/4-inch plywood offcut at least 22 x 9-1/4 inches (or two 10-1/2 x 9-1/4-inch pieces), two 8-foot 1x3 boards, one 8-foot 1x4 board, and approximately 40 compatible 1-1/2-inch finish nails or brads. Hearing protection is recommended if you use a brad nailer.
New to buying boards? Read woodworking lumber basics to understand nominal versus actual sizes, and see our guide to beginner woodworking tools.
Cut list
Check actual board thickness and width before cutting. Nominal 1x3 stock is assumed to measure 3/4 x 2-1/2 inches; nominal 1x4 stock is assumed to measure 3/4 x 3-1/2 inches.
| Part | Quantity | Actual size / cut |
|---|---|---|
| Plywood end panels | 2 | 3/4 in plywood; 10-1/2 in W x 9-1/4 in H |
| Long side slats | 6 | 1x3 (3/4 x 2-1/2 in), 18 in long |
| Bottom boards | 3 | 1x4 (3/4 x 3-1/2 in), 18 in long |
If measuring and marking is new to you, read how to measure and mark wood. Not sure how to read a cut list? See how to read a woodworking cut list.
How to make a wooden crate: step-by-step
Step 1: Cut the parts
Cut two identical plywood end panels 10-1/2 in wide by 9-1/4 in tall. Cut six 18 in 1x3 side slats and three 18 in 1x4 bottom boards. Check actual lumber sizes before cutting.
Step 2: Position the end panels
Sand the cut edges. Mark each end panel with its bottom edge and its two narrow vertical edges. Place the end panels upright and parallel, with their outer faces 16-1/2 in apart and their centers at x = 1-1/8 in and x = 16-7/8 in in the final crate.
Step 3: Attach the first front slat
Position the first long side slat against the front vertical edges of both end panels, its bottom edge 3/4 in above the eventual crate bottom. Align the slat ends with the final x = 0 and x = 18 in planes. Glue the contact areas, clamp, and fasten at both ends.
Step 4: Add the remaining slats
Install the middle and upper front slats. All three slats are 2-1/2 in tall. From the crate bottom their vertical spans are 3/4 to 3-1/4 in, 4-1/8 to 6-5/8 in, and 7-1/2 to 10 in. This gives two 7/8 in gaps. Repeat for the back side.
Step 5: Lay the bottom boards
Turn the crate upside down. Lay the three 1x4 bottom boards across the full 18 in length, with their long edges touching, beneath the plywood end panels and between the front and back side walls. Their combined 10-1/2 in width matches the plywood end panels. Apply glue to the bottom edges of both end panels and clamp the boards in place.
Step 6: Fasten the bottom
Fasten each bottom board down into each end panel with two predrilled 1-1/2 in finishing nails or compatible 18-gauge brads per board/end junction. Check that fasteners are centered in the 3/4 in plywood edge and do not emerge through a face.
Step 7: Cure, sand and finish
Allow the glue to cure according to its label, then inspect the joints, sand any sharp corners, and apply a finish appropriate for indoor storage.
For smoother surfaces, read how to sand wood and wood finishing basics.
Fastener placement and fit checks
Use exterior-facing 1-1/2 in finish nails or 18-gauge brads with wood glue: two fasteners at each end of each side slat (24 total), and two at each end of each bottom board (12 total), for 36 total.
Side slats: center the pair at x = 1-1/8 in or 16-7/8 in, and at 1/2 in above and below the center of each slat course.
Bottom boards: fasten at x = 1-1/8 in and 16-7/8 in, at y = 1-5/8 and 3-3/8 in (front board), 5-1/8 and 6-7/8 in (middle board), and 8-5/8 and 10-3/8 in (back board), measured from the outside front edge.
Pre-drill if hand nailing. Do not substitute long screws driven into narrow plywood edges.
Coordinate check: x = 0 to 18 in overall length; y = 0 to 12 in overall width; z = 0 to 10 in overall height. End panels occupy x = 3/4 to 1-1/2 in and 16-1/2 to 17-1/4 in, y = 3/4 to 11-1/4 in, z = 3/4 to 10 in. Front side slats occupy y = 0 to 3/4 in; back side slats y = 11-1/4 to 12 in; both run x = 0 to 18 in. Bottom boards occupy x = 0 to 18 in, y = 3/4 to 11-1/4 in, z = 0 to 3/4 in. Bottom boards bear against and are attached to the lower edges of the end panels.
Confirm 18 x 12 x 10 in overall; front and back slats flush at top; 7/8 in gaps between courses; bottom boards fill the 10-1/2 in interior width. Measure actual stock before assembly. Inspect all nails for protruding points.
Download the free wooden crate plan
The printable plan includes the cut list, verified dimensions and layout, fastening schedule, all seven assembly steps, and final checks for the fixed-bottom, end-panel crate.
Common mistakes to avoid
- Adding the end panels outside the 18-inch side slats changes the finished length. Keep them inset as specified.
- Cutting bottom boards to 12 inches wide would overlap the side slats; the combined bottom width is 10-1/2 inches.
- Driving nails near a plywood edge without proper alignment may split layers or cause points to emerge.
- Using the crate for heavy loads, or lifting it full, without an appropriately reinforced design.
Finishing ideas
Sand corners and exposed plywood edges. For a natural appearance, use a clear indoor finish. Paint or stain is another option; follow product instructions for preparation, drying, and ventilation. Do not apply a finish until the glue has cured.
Frequently asked questions
Can I make a DIY wooden crate without pocket holes?
Yes. This version uses end panels, glue, and finish nails or brads, so no pocket-hole jig is required.
Can I use all solid pine boards instead of plywood ends?
Not without redesigning the end panels: a single standard 1x10 board is not wide enough to provide the specified 10-1/2-inch end width.
Can I add handles?
Handles are not included in this plan. They would change the lifting and fastening requirements.
Is this suitable for outdoor storage?
It is specified for indoor use. Outdoor service would require different material and finish choices.
More beginner woodworking projects
Explore the completed Wooden Patio Planter Box, Simple Wooden Phone Stand, and Simple Wall Shelf projects in the Wood Project Lab project library, or see the full beginner woodworking projects collection.
Final thoughts
This beginner wooden crate plan focuses on straightforward cuts and a fixed bottom. Confirm the measurements on your actual lumber, follow the assembly sequence, and use the finished crate for lightweight indoor organization.
This is an educational woodworking design. It is dimensionally checked but not physically tested, and no load rating or tested weight capacity is provided. It is intended for lightweight, stationary indoor storage: do not lift the crate while it is loaded, and do not use it as a step stool or seat. Plywood edge fastening and glue quality affect durability. For heavier use, choose a separately engineered crate design.
Construction reference: Ana White, Wood Crate Building Guide (end-panel-and-slat construction concept). Dimensions and assembly schedule developed for Wood Project Lab. Ana White, Wood Crate Building Guide.
Related Projects
 BeginnerPlan available
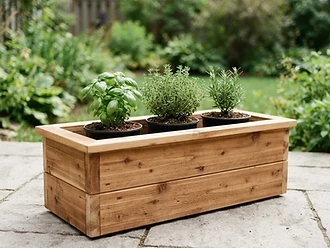
Simple Wooden Patio Planter Box
A low cedar planter, 24" × 10" × 11", with a removable slatted bottom for small nursery pots, a full cut list and a free printable plan.
 BeginnerPlan available
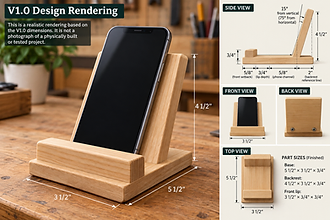
Simple Wooden Phone Stand
A dimensionally checked three-part plan with a full cut list, technical drawing and step-by-step instructions.
 BeginnerPlan available
Simple Wall Shelf
A 24-inch bracket shelf with a full materials list, bracket placement dimensions and a step-by-step installation sequence.


