How to Make a Wooden Tray: Easy DIY Serving Tray Plans
A beginner serving tray with a flat plywood bottom and four low pine sides. Includes exact dimensions, a five-piece cut list, seven assembly steps, and a free printable PDF.
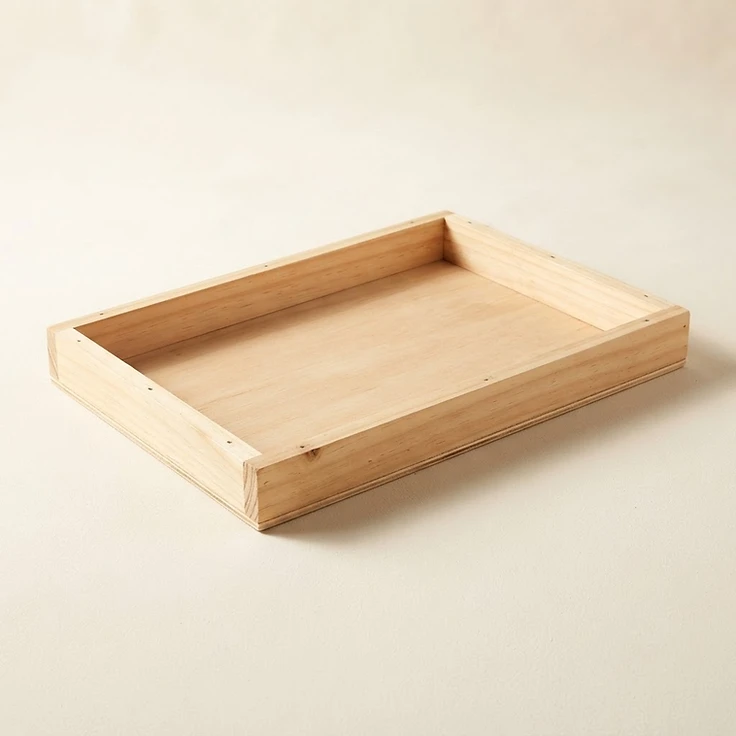
Design rendering of the V1.0 tray: a flat plywood bottom with four low pine sides on top and no handles. This is an illustration, not a photograph of a finished build.
On this page
Introduction
Learn how to make a wooden tray using a plywood base, four pine rim pieces, wood glue, and brad nails. This straightforward project uses square cuts and a simple butt-jointed rim, making it suitable for a beginner who has access to a compatible brad nailer.
The finished tray measures 16 inches long, 10 inches wide, and 2¼ inches high. It has a flat plywood bottom, four low raised sides, and no handles.
Still choosing a first build? Browse our beginner woodworking projects or small woodworking projects.
Project at a glance
Materials and tools
Materials: one 16 × 10 × ¾-inch plywood bottom (a ¾-inch plywood offcut at least 16 × 10 inches); nominal 1×2 pine totaling at least 49 linear inches plus kerf (two 16-inch long sides and two 8½-inch short ends); wood glue; ten 18-gauge × 2-inch brad nails (purchase extra); optional wood filler and finish. Tools: saw, measuring tape, square, clamps, sanding block, safety glasses, hearing protection, and a brad nailer rated for 2-inch brads.
New to buying boards? Read woodworking lumber basics to understand nominal versus actual sizes, and see our guide to beginner woodworking tools.
Cut list
This cut list makes one tray (five pieces). Dimensions assume actual 1×2 stock of ¾ × 1½ inches. Verify your lumber before cutting.
| Part | Qty | Finished size (inches) |
|---|---|---|
| Plywood bottom | 1 | 16 L × 10 W × ¾ thick |
| Long sides (1×2) | 2 | 16 L × 1½ H × ¾ thick |
| Short ends (1×2) | 2 | 8½ L × 1½ H × ¾ thick |
If measuring and marking is new to you, read how to measure and mark wood. Not sure how to read a cut list? See how to read a woodworking cut list.
How the tray fits together
The 16 × 10-inch plywood bottom defines the outside footprint. The 16-inch long sides sit along the front and back edges of the bottom. The 8½-inch short ends fit between them: 8½ + ¾ + ¾ = 10 inches.
The bottom is ¾ inch thick and the rim rises another 1½ inches, giving an overall height of 2¼ inches. All rim pieces sit on top of the plywood, not beside it.
How to make a wooden tray: 7 steps
Step 1: Check lumber and mark cuts
Confirm actual 1×2 stock is ¾ × 1½ inches. Mark the plywood bottom and four rails. Cut square and dry-fit; correct the plan if your stock differs.
Step 2: Prepare the parts
Sand cut edges and faces, removing splinters. Keep mating glue surfaces clean. Dry-fit the two 16-inch long sides along the long edges of the plywood and the two 8½-inch ends between them.
For smoother surfaces, read how to sand wood.
Step 3: Glue the rim
Apply a thin continuous bead of wood glue to the bottom edge of each side and to the four butt-joint contacts. Position the rim ON TOP of the plywood, flush with the outer edges. Clamp square. Wipe excess glue.
Gluing up? See wood glue basics.
Step 4: Fasten long sides
With the assembly clamped, drive three 18-gauge, 2-inch brad nails vertically DOWN through each long side into the plywood, at x = 2, 8, and 14 inches measured from the left end; nail centers are ⅜ inch in from the long outside edge. Use a nailer rated for these fasteners and follow its safety instructions.
Step 5: Fasten short ends
Drive two identical 2-inch brads vertically DOWN through each short end into the plywood, at y = 3 and 7 inches measured from the front outside edge, centered ⅜ inch across the thickness of the end. Keep fingers away from the nail path.
Step 6: Check and cure
Check the tray is square and all nail heads are flush or slightly recessed. Let the glue cure for the period stated by its manufacturer before use. Do not lift the tray by its rim while the glue is curing.
Step 7: Finish and use
Fill nail holes if desired, sand, remove dust, and apply a finish suitable for the intended use according to the finish manufacturer. Use as a light-duty serving/display tray; do not claim a tested load capacity. Avoid direct food contact unless the cured finish is explicitly suitable for that use.
Choosing a finish? Read wood finishing basics.
Exact nail placement
Use ten 18-gauge × 2-inch brads, all driven vertically downward through the top edge of the 1½-inch-tall rim. Put three nails through each long side, 2, 8, and 14 inches from the left end. Put two nails through each short end, 3 and 7 inches from the front outside edge. Center every nail across the ¾-inch thickness of its rim piece.
With a square drive, a 2-inch brad passes through 1½ inches of rim and enters the plywood about ½ inch; it should not exit the ¾-inch bottom if driven squarely at the specified depth. Test with scrap and keep hands clear of nail paths. Glue provides much of the joint integrity; nails hold parts while it cures.
Coordinate check (x along the 16-inch length, y across the 10-inch width, z upward from the underside of the plywood): plywood z 0–¾. Long sides y 0–¾ and 9¼–10, z ¾–2¼. Short ends x 0–¾ and 15¼–16, y ¾–9¼, z ¾–2¼.
Free wooden tray plans
Download the V1.0 printable PDF for the complete cut list, coordinate-based fastening locations, and seven assembly steps. The PDF and article share the same specifications.
Finishing your DIY wooden serving tray
Ease sharp edges with sandpaper. Fill nail holes if desired. Choose a finish based on whether the tray will see moisture or direct food contact. Follow the product manufacturer’s cure instructions. Do not assume a finish is food-contact suitable without manufacturer confirmation.
Common mistakes to avoid
- Using 1¼-inch brads from the top of the 1½-inch-tall sides; they will not reach the plywood.
- Installing the rim beside the plywood instead of on top; that changes the footprint.
- Omitting clamps or relying on nails alone instead of glue.
- Using the tray before the adhesive and finish have cured.
Frequently asked questions
What wood is best for a beginner wooden tray?
Pine 1x2s are easy to cut and widely available. A flat ¾-inch plywood bottom simplifies the build.
Can I make this wooden tray without handles?
Yes. This design intentionally has no handles, which keeps the cuts and joints simple.
Why use 2-inch brad nails?
They pass through the 1½-inch rim and enter the plywood about ½ inch when driven vertically; shorter 1¼-inch brads would not reach the base.
Can I use this as a food tray?
It can hold dishes or wrapped items, but direct food contact depends on the cured finish and its manufacturer’s guidance.
How much weight can the tray carry?
No load rating has been tested. Use it for lightweight indoor serving or display, and avoid heavy or unstable loads.
Related projects
Explore the Wooden Storage Crate, Wooden Bookends and Wooden Patio Planter Box, browse the full woodworking plans library, or see all beginner woodworking projects and small woodworking projects.
Final thoughts
A simple wooden tray is a useful introduction to measuring, square cuts, clamping, gluing, and finishing. Keep the printable plan nearby and verify actual lumber dimensions before cutting.
Educational light-duty design, not a physically tested product. No tested load capacity or food-contact certification is claimed. Use suitable PPE, follow your tool manuals, clamp pieces before nailing, and keep hands away from nail paths and possible blowout. Never nail into a hand-held piece. Wood dimensions and tool settings vary, so confirm with a scrap test.
Related Projects
 BeginnerPlan available
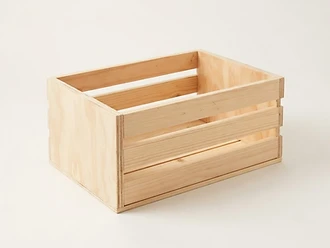
Wooden Storage Crate
An open-top pine and plywood slatted crate, 18" × 12" × 10", with a full cut list, seven assembly steps and a free printable plan.
 BeginnerPlan available
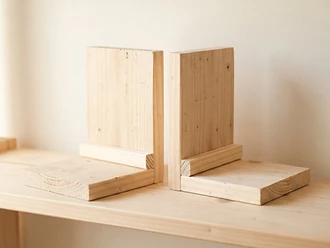
Wooden Bookends
A matching pair of L-shaped pine bookends, 5½" × 6" × 6¾" each, with an inside cleat, a six-piece cut list, seven steps and a free printable plan.
 BeginnerPlan available
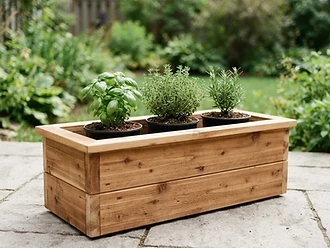
Simple Wooden Patio Planter Box
A low cedar planter, 24" × 10" × 11", with a removable slatted bottom for small nursery pots, a full cut list and a free printable plan.


