Simple Birdhouse Plans: Easy DIY Birdhouse with Free PDF
A compact Carolina Chickadee nesting box with a 1⅛-inch entrance, sloped roof, drainage and ventilation holes, and a removable cleanout side. Includes a cut list, eight steps and a free printable PDF.
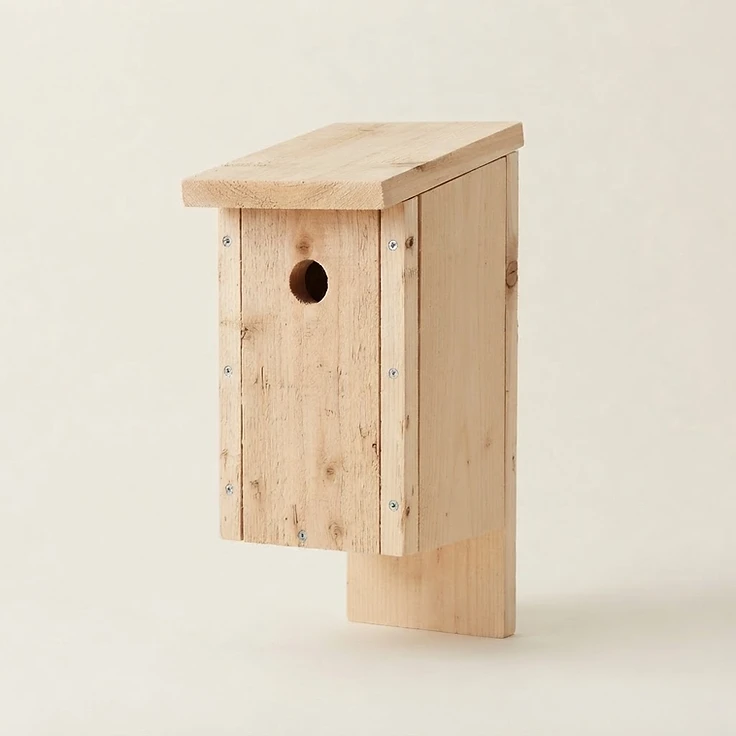
Design rendering of the V1.6 nest box: a simple rectangular box with a sloped roof, a 1⅛-inch entrance and no perch. This is an illustration, not a photograph of a finished build.
On this page
A simple wooden birdhouse with a practical purpose
These simple birdhouse plans show how to make a compact wooden nesting box intended for Carolina Chickadees. The design uses untreated lumber, a 1⅛-inch entrance hole, a sloping roof, drainage and ventilation openings, and a removable side for cleaning. Follow the overview below and download the free dimensioned PDF for the exact cuts and fastener locations.
Unlike a decorative birdhouse, this design has no perch and leaves the interior unfinished.
This is a documented, unbuilt plan. Dimensions have been checked on paper, but the box has not been physically assembled or weather-tested.
Still choosing a first build? Browse our beginner woodworking projects or small woodworking projects.
Project at a glance
Materials and tools
- Untreated ¾-inch cedar or pine boards wide enough for the specified panels and roof
- #6 × 1¼-inch exterior-rated screws (the V1.6 schedule uses 18)
- Saw capable of accurate straight and bevel cuts; drill, pilot bit and countersink
- 1⅛-inch hole saw or Forstner bit; ¼-inch bit for drainage and ventilation holes
- Tape measure, square, pencil, clamps, and sandpaper
- Appropriate exterior mounting hardware for the selected location
New to buying boards? Read woodworking lumber basics, and see our guide to beginner woodworking tools.
Cut list and dimensions
This cut list makes one nest box (six pieces). The V1.6 PDF is the controlling reference for drawings, bevel angles, panel geometry and the screw schedule. Do not substitute a generic birdhouse cut list: the top bevels and roof slope must match.
| Part | Qty | Dimensions / cut detail (inches) |
|---|---|---|
| Front | 1 | 5½ W × 9 H; bevel top 10.3° |
| Back | 1 | 5½ W × 12 H; bevel top 10.3° |
| Fixed left side | 1 | 4 D; top heights 9.136 to 9.864 |
| Removable right side | 1 | 4 D; bottom raised ⅛; tapered top (9.011 front, 9.739 rear) |
| Floor | 1 | 4 × 4 × ¾ |
| Roof | 1 | 7 W × 7 9/16 along roof slope; trim to fit |
The front is 9 inches high; the back is 12 inches high and extends 2 inches below the box for mounting. The two side panels are 4 inches deep and fit between the front and back, so the front and back cover both side ends. Outside footprint is 5½ × 5½ inches with a 4 × 4-inch clear floor.
The roof underside follows the plane z = 9 + y/5.5, a rise of 1 inch across 5½ inches (about 10.3°). Bevel the tops of the front and back to match. Overhang is about 1.2 inches horizontally at the front and 0.7 inches at the rear.
| Opening | Location (inches) |
|---|---|
| Entrance | 1⅛ in diameter, front, centered at x = 2¾, z = 7½. Lower edge is 6 3/16 in above the floor. |
| Floor drainage | Four ¼-in holes at x = 1½ and 4; y = 1½ and 4. |
| Side ventilation | Two ¼-in holes per side at y = 1¾ and 3¾, z = 8¼. |
If measuring and marking is new to you, read how to measure and mark wood. Not sure how to read a cut list? See how to read a woodworking cut list.
How to build a simple birdhouse
Step 1: Cut and label the pieces
Cut the front, back, floor, tapered fixed side, removable side, and roof. Bevel the front and back tops to the roof slope, and dry-fit the body to check the 4 × 4-inch clear floor opening.
Step 2: Drill the entrance, drainage and ventilation
Center the 1⅛-inch entrance on the front as shown in the plan, then drill the four floor drainage holes and the side ventilation holes at the PDF locations. Smooth the edges, remove splinters, and leave out any perch.
For smoother edges, read how to sand wood.
Step 3: Assemble the fixed walls
Predrill every end-grain connection. Screw the front and back to the fixed left side using the documented screw positions.
Step 4: Install the floor
Fit the floor between the walls and screw it through the front and back. Never attach the floor to the removable side.
Step 5: Attach the cleanout side
Fit the removable right panel with its ⅛-inch bottom clearance and secure it with the four removable wall screws only. Do not glue this panel.
Step 6: Dry-fit the roof
Center the roof across the box and confirm the overhangs and clearance of the removable side.
Step 7: Fasten the roof
Screw the roof into the front, back and fixed left side only. Never fasten the roof to the right cleanout side.
Step 8: Inspect and mount
Check for protruding screw tips, splitting, blocked vents and trapped water. Follow regional species-specific mounting and predator-protection guidance.
Screw schedule
The V1.6 plan uses 18 #6 × 1¼-inch exterior-rated screws at these locations.
| Connection | Count | Screw center / direction (inches) |
|---|---|---|
| Front to left side | 2 | x = ⅜; z = 2, 7½; drive +y |
| Back to left side | 2 | x = ⅜; z = 2, 7½; drive −y |
| Front to right side | 2 | x = 5⅛; z = 2, 7½; drive +y |
| Back to right side | 2 | x = 5⅛; z = 2, 7½; drive −y |
| Front to floor | 2 | x = 1¾, 3¾; z = ⅜; +y |
| Back to floor | 2 | x = 1¾, 3¾; z = ⅜; −y |
| Roof to front | 2 | x = 1¾, 3¾; y = ⅜ |
| Roof to back | 2 | x = 1¾, 3¾; y = 5⅛ |
| Roof to left side | 2 | x = ⅜; y = 1¾, 3¾ |
Datums: x runs left to right (0 to 5½), y front to rear (0 to 5½), z vertical, with z = 0 at the bottom of the front panel. Roof screws drive perpendicular to the roof into the beveled receiving edges, with a nominal embedment of 1¼ − ¾ = ½ inch. Predrill and use a depth stop.
Why entrance size matters
The 1⅛-inch entrance is selected for Carolina Chickadees, not all backyard birds. Bluebirds and other species require different nest-box specifications. Do not enlarge the opening to attract multiple species without redesigning the box around the intended bird.
Ventilation, drainage, and cleaning
A functional nest box should shed rain, drain incidental moisture, and allow seasonal cleaning. This plan includes four floor drainage holes, high side vents, a sloped roof, and a removable side. Clean only when the box is unoccupied and in accordance with applicable wildlife guidance. To clean, remove the four retaining screws from the right side; the roof is fastened to fixed parts only.
Common mistakes to avoid
- Using treated wood or finishing the inside of the nesting cavity
- Adding a perch that is not needed for chickadees
- Using square-cut top edges under the sloped roof
- Driving roof screws into the removable side
- Skipping pilot holes near narrow board edges
- Assuming any birdhouse dimensions work for every species
Free printable birdhouse plans
Download the Simple Wooden Birdhouse Master Construction Plans V1.6 PDF for the full cut list, dimensioned illustrations, roof bevels, entrance placement, assembly steps, and fastener locations. The PDF and this article share the same specifications.
Frequently asked questions
Is this a beginner woodworking project?
Yes, but accurate taper and bevel cuts are important. Review the dimensioned drawing before cutting.
Can I use pine instead of cedar?
Untreated pine is an option, though exterior durability varies with exposure and maintenance.
Does the birdhouse need a perch?
No. The intended nesting box does not include a perch.
Can I use these plans for bluebirds?
No. Bluebirds require their own entrance and nesting-box specifications.
Can the box be cleaned?
Yes. The right side is removable after its four retaining screws are withdrawn, provided the roof has been installed only on fixed parts.
Related projects
Explore the Wooden Storage Crate, Wooden Serving Tray and Simple Wall Shelf, browse the full woodworking plans library, or see all beginner woodworking projects.
Editorial and technical references
Use Cornell Lab of Ornithology NestWatch species-specific guidance and regional wildlife-agency recommendations to verify placement and seasonal maintenance. The V1.6 master PDF is the sole source of this project’s construction dimensions.
A simple nest box is a good exercise in accurate bevel cuts, predrilling and planning for maintenance. Keep the V1.6 plan nearby, and remember that this design has not been built or weather-tested.
Unbuilt, untested design. The plans are dimensionally coordinated on paper, but the box has not been physically assembled or weather-tested. Wear eye and hearing protection, clamp pieces before cutting or drilling, and follow your tool manuals. Check local nest-box placement, predator-protection and cleaning guidance before installing.
Related Projects
 BeginnerPlan available
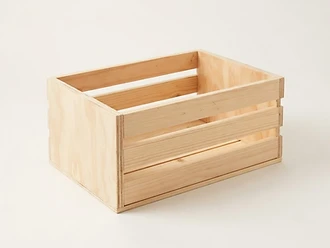
Wooden Storage Crate
An open-top pine and plywood slatted crate, 18" × 12" × 10", with a full cut list, seven assembly steps and a free printable plan.
 BeginnerPlan available
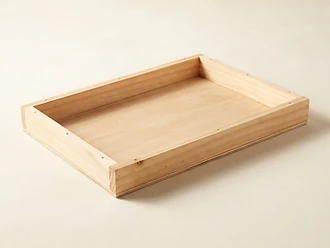
Wooden Serving Tray
A handle-free pine and plywood tray, 16" × 10" × 2¼", with a five-piece cut list, ten-nail fastening schedule, seven steps and a free printable plan.
 BeginnerPlan available
Simple Wall Shelf
A 24-inch bracket shelf with a full materials list, bracket placement dimensions and a step-by-step installation sequence.


